Saturday, February 20, 2021

Winter Sunsets are Amazing in a Model 3

 Love driving around in sub zero temperatures in my Tesla and watching the sunsets, so different so amazing.

Sunset during a drive home

Saturday, February 13, 2021

Tesla Update 2021.4.3 - Minor Fixes

Got the 2021.4.3 Update last night. Looked this morning and it appears that there were no major improvements, just minor bug fixes.

Tesla Update 2021.4.3


Sunday, January 31, 2021

Using the Tesla Boombox feature on same USB Drive as Tesla Cam using Windows 10

I finally got a Tesla Boombox feature working on my Model 3, almost a month after release...maybe because of the cold or maybe just lack of time to sit with a computer and get it figured out. Anyways, I made a short instructional video on how to format a single USB drive using Windows 10 for both the Tesla Dashcam and Tesla Boombox. Well actually all three, when Tesla Track Mode is included in the mix.


There is a subtle trick because Windows cannot format two exFAT partitions consecutively.
Here are the manual instructions illustrated by screenshots:

Friday, January 22, 2021

Tesla Update 2020.48.35.5 - No Major Improvements

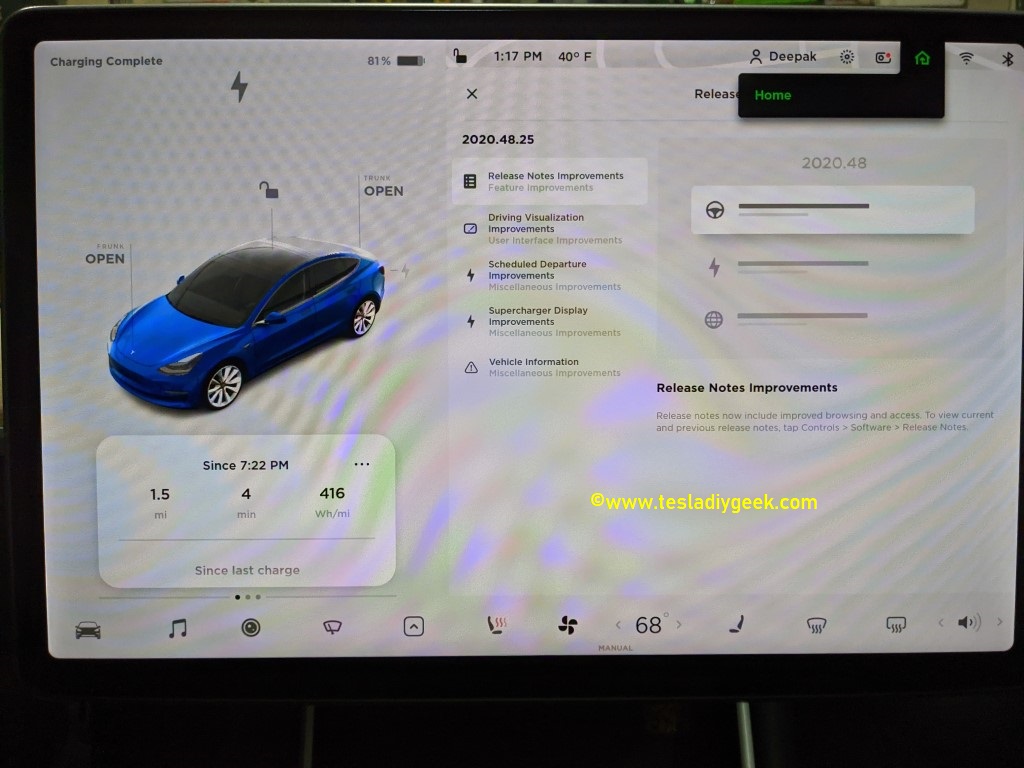
Got the 2020.48.35.5 Update last night. Seems like it is minor improvements, no major items from the last release of 2020.48.35. Just a minor release.

Release Notes Improvements

more details...

Friday, January 1, 2021

New Year's Eve Present - Tesla Update 2020.48.30

A hours before the end of the year, just a week after the last update on Christmas day, the 2020.48.30 Update dropped and it included the talked about feature called Boombox. Boombox allows some dedicated and custom sounds to be played via the external speakers of the front of the car. Some of the other features include the features from the last update and also a few more:
  • Added the game Battle of Polytopia
  • Added Cat Quest
  • Added Solitaire (look like it is based on the Android version of the best selling Solitaire) 
  • Added Boombox
  • Improved Emissions Testing Mode - Ability to play fart sounds outside the car :-)
The full release notes are below:

2020.48.30 Update

Additional details for each of the items

Saturday, December 26, 2020

Merry Christmas - Tesla Update 2020.48.25 - New UX!!!

Nice little Christmas present from Tesla. Got the 2020.48.25 Update on Christmas Day! Thanks Tesla.
Unwrapping this present gave a brand new User Interface and Experience and I love it. Without any more delay here are the goodies:
  • New Release Notes format
  • New Instrument Cluster (aka left side of screen) - lots of improvements here such as camera and wiper button re-location, all new vehicle graphics, etc.
  • Scheduled Departure Improvement
  • Supercharger on Map Display improvement - no more counting red lines, a number simply shows available spots
  •  the Tesla "T" is gone from the top menu
New UX!

The details of the update and a quick walk though some of the changes are below:

Saturday, December 19, 2020

Pi Zero Time Lapse Camera App and Enclosure


Background


My daughter got her first hand-me-down Google Pixel phone last spring. She was excited to have a camera of her own and started taking pictures of the willow tree in our backyard every morning. She wanted to make a time lapse of the willow tree sprouting leaves.
There was a slight problem with her approach though - she was not always capturing pictures from the same angle, or at same time of day or on some days she completely forgot to take pictures in the rush to get to school and other activities.
So as "daddy-daughter project" over a weekend, we built a camera using a Raspberry Pi Zero that would do the work for her. This description outlines the work we did and provides instruction to anyone who maybe interested in doing a similar project.
Example of Results Captured


Upon completion, we scheduled a time lapse over 2 days (every 4 hours) and captured some pictures which we converted to an animated gif. Luckily, we caught a late spring snow flurry weekend in May.
Willow Tree in May - Two Day Time lapse

To make your own ...

Thursday, December 10, 2020

Oh Oh! I was a bad boy....got put into Autopilot jail.

I was cruising along at the speed limit on autopilot, and it automatically changed to the left lane to overtake a semi carrying giant pipes. Quickly from behind came a car charging at 95-100 mph, so I quickly sped up to get around the semi....big mistake...Autopilot was not happy with me.  Probably I should have let the speeding butthole slow down behind me, but that would just propagate more Tesla hate.

For the rest of the trip until I stopped Autopilot could not be engaged.

Autopilot Jail


Monday, December 7, 2020

Dec 2020 Update - New Text Message App & Sentry Mode Updates

Got the December 2020 software Update last night. Huge improvements to text messaging. The overall improvements are:

  • Ability to view messages under Calls Menu
  • Double click to dismiss a message and one click to respond.
  • Trax v0.2 redesigned to be easier on the screen
  • Sentry Mode of last panic event is stored onto onboard memory  and can be download to USB  via the dashcam viewer.
Here are the release notes:
Text Messaging is now much easier

Continued:

Sunday, November 1, 2020

Winter is Coming.

I like to break up the measurement of power efficiency (Wh/mi) into two distinct seasons - summer and winter. But, since I live in a place with four seasons, basically I am using the Daylight Savings Time (DST) switch over as the time to reset one of the trip counters in my Model 3 to keep track of average energy consumption. I am rather happy with the performance of the vehicle over the 2020 spring and summer.

March to October (DST) consumption

Averaged 248 Wh/mi for over 4,899 miles of driving. consuming 1,216kWh of energy. 

By comparison my solar panels made ~7.5MWh during the same period, in fact just the solar production during the month of July 2020 covered all the energy consumed by the car. 

The lifetime consumption at the same time was

Saturday, October 31, 2020

Oct 2020 Update - Speed Limit as Percentage, Spotify, Music Sources and more..

 Got the  October update on Halloween and it was backed with lots of goodies:

  • Autopilot speed limit offset can be set as a % rather of current speed rather than an absolute
  • Spotify improvements - it now takes over from my other devices seamlessly and I can use my phone to control what is playing in my Tesla...sweetness!
  • Improved media search by putting results into categories
  • Selecting which media sources are displayed
  • New Voice Recognition Languages
Here are the release notes and some of the detail screens:

October 2020 Updates

Monday, October 12, 2020

How low can you go? Beating range anxiety.

Wanted to give the battery a full cycle so on the way back home from a trip, I skipped a super charger stop since I could get home with ~5% battery. As I got closer to home I started using up more battery to get home as low as possible and managed to get down to 2%. 

I have heard some horror stories of the Model 3 needing a jump from an external 12V system to get it going, so I wanted to avoid hitting 0%, though I am not sure if it would drain the 12V battery. I guess 2% was my personal tolerance on my range anxiety. Surprisingly, I still had ~5 miles left per the computer based on the last 5 miles of my crazy driving....not bad.

Battery down to 2%

What I learned was that 15% state of charge is a lot, the usage of battery slows down considerably below that. Of course this is not good for the battery's longevity, so I don't think I will be taking it below 10% ever again, and I rarely take it over 90%. Sometimes to 95% during long trips.

Friday, October 9, 2020

Update October 2020 - Glovebox PIN, Speed Assist and BT Priority

 The October 2020 update dropped for my Model 3 and it has 3 nice little goodies.

Oct 2020 update features

I really appreciate the Speed Assist Improvements because I use Autopilot a lot and even though the highway speed detection has gotten better with the last update, the more local (those county and city roads with 65, 55 and 35 mph limits switching around) it was still dicey. This caused me concerns when going through small towns where the income is based on traffic tickets, basically made me double check Autopilot's speed management whereas I want to be a lazier driver 😎.

Looking a little deeper at the other improvements...

Thursday, October 1, 2020

Premium Connectivity - A must for audiophiles and limited data plans

Hard to believe it's been a year with my Model 3. Fortunately, the free premium connectivity expiring was a good reminder 😏. Two days after premium connectivity expired, the satellite maps and the live traffic icons were gone from the map and clicking on the Tesla T icon to bring up car information indeed indicated "Standard Connectivity".

Essentially the system rebooted at some point and disabled the features only available with premium connectivity. I signed into my account online (not via the mobile app) and was able to signup and restore the premium connectivity. The Tesla system then rebooted 2-3 times, which was bizarre, and premium connectivity was restored.

Premium connectivity restored


The comparison of the two options as per Tesla are below...

Friday, September 25, 2020

DIY - Fix rattle of door tweeters

Both the front door tweeters developed a creaking noise. Not caused by the sound being produced from the speakers, rather when going over road bumps and imperfections, and it drove me nuts. At first, I couldn't identify where the sound was coming from except from the A-pillar area. Eventually putting a little pressure on the tweeter while driving made me realize the tweeter enclosures were the culprits. I asked my daughter to try the same with the passenger side and it was the identical issue.

Upon removal of the entire tweeter enclosure, and just squeezing it with just slight pressure reproduced the creaking noise. Essentially the enclosure comprises two pieces of plastic snapped together with the tweeter encased. The grade of plastic used, lack of foam lining, and the general position of the case between the rubber door gasket and door frame are all responsible for the creaking symptoms.

Fortunately the fix was easy and took all but 5 minutes per site. I inserted a small piece of foam under the door panel and lined the two edges of the enclosure with thin double-sided 3M tape and then replaced the tweeter. SO far in 3 weeks and many 100s of miles of driving they have not made a sound!

A piece of foam and some double sided 3M tape fixed creaking from tweeters

To remove the tweeter enclosure...

Saturday, September 19, 2020

DIY - Tire rotation. Recommend doing it every 5-6k miles.

I rotated the tires this morning. The rear tire depth was a hair above 7/32nd and the front tire depth was just under 9/32nd (not quite to 8/32nd) at 5100 miles. These tires at new come as 9/32nd per the specs at Tire Rack

Rear tires wear out much quicker even on an AWD

So the rear tires seem to wear out at approximately 1.5/32nd in 5000 miles and the front at 0.5/32nd in the same periods, or 3x faster in the rear. Since these tires are rated 400AA and should last ~40,000 miles when they reach 2/32nd and I seriously find that is going to be impossible to achieve.

They key for longevity is both correct pressure and frequent rotations. 

Friday, September 11, 2020

DIY Xpel Ultimate PPF on Hood, Mirrors and Front Bumper

After doing the DIY Xpel PPF for the top of the rear bumper and rear rocker panels by cutting a standard Xpel roll myself, I decided to try the mirrors, hood and front bumper. Arguably a lot harder, and required lots of patience, learning on the fly and attention to details was key. But it is done and I am happy with the results, specially for a DIY project.

DIY Xpel on Hood - Bikini Cut

I bought my pre-cut kits at a discounted price, compared to OEM pricing listed on the Xpel website, by contacting Chad Baker. Paid via PayPal and got the Fedex shipments in 2 days. I took my time and did this over 2 days in the garage.

Here are some tips:

Wednesday, September 2, 2020

Update Sept. 2020 - Green Light Chime and Speed Limit Sign Detection

 Busy Summer for Tesla, I feel that I am getting updates every week. This week (or month) it seems that Autopilot is getting smarter. Almost seems like different teams at Tesla are competing to get updated out.

For those that use the Autopilot feature of Stop Light/Sign recognition, a few updates ago Tesla added the feature that the stop line drawn on the screen would turn red or green depending on the color of the traffic lights. Seems maybe too many Tesla drivers were distracted 😏 while waiting for the light to turn green and tap the accelerator pedal, so now it appears that upon a green light, the car will chime as a notification to make a decision to move.

Green Traffic Light Chime

Additionally, the cameras can now read the traffic limit signs. This is good because I often observed that using the GPS data, usually the car would slow down a little past the sign. When I am driving through small remote towns, whose main source of income is traffic speed violations (you know exact the ones I am talking about), the car was susceptible to tickets especially when the speed goes from 55mph --> 35mph --> 25mph --> 35mph --> 55mph in the stretch of 1 mile, and there are cops parked right at the 35 mph sign in both directions.

Others improvements include:

Wednesday, August 26, 2020

Update August 2020 - Car Left Open Notifications

At times it seems as though Tesla is reading my mind. On a recent trip we stopped for some food and my daughter left the rear door part way latched. I happen to glace at my app in the store and noticed that and had to go back to close it. A week later this update drops and I was ecstatic.

Notification on Tesla app for Door left open

For the late August update, 3 new features:

Tuesday, August 18, 2020

DIY Paint Protection Film - Rear Bumper and Rocker Panels

I have always used Xpel paint protection film (PPF) on my cars for the front bumper and partial hood. My GT-R has 3M stuff because 12 years ago, Xpel was not as common. The good side is that bugs in summer, rock chips all year round and salt chips in winter do not damage the front of the car, especially highway driving.

The Xpel PPF is also self healing, which has been good over the years. The one down side is that it increases the cost of repair. Having a bumper to bumper accident that requires work on the bumper adds an extra cost to the repair. The film need to be removed and new one reapplied and many times insurance will not cover the extra costs.

A buddy of mine owned the only Xpel certified shop in town and he recently sold it and moved, so I decided to try my DIY skills. The two areas of concern for me were the top of the rear bumper on which I saw a scuff mark from loading/removing my bike into the trunk and the rear rocker panels for which Tesla is offering a DIY kit on their accessory site. 

DIY Xpel PPF cut and applied to top of rear bumper

Saturday, August 8, 2020

Backup Camera with Side View Added

When non-Tesla owners ask why I like my Tesla so much, this simple feature says it all. My car gets better, more useful and smarter with every update almost every month. Software > Hardware. With the June 2020 Update, Tesla added the ability for the side cameras (referred to as repeaters) be added wit the backup camera.

All I had to do was shift to reverse and swipe the image from the backup camera on screen up, and viola, the left and right side are visible. So handy when backing up into a spot for charging, also useful in my garage and bonus - the image is visible with the camera option while the car is moving forward, which assists in tight maneuvers. Bravo Tesla.

Using side repeaters to help with parking

Saturday, August 1, 2020

Thank you for Autopilot speed limit adjustment on local roads

At some point Tesla decided that on local roads, that are not official highways, they would limit autopilot speed to the speed limit. I really didn't care about neighborhood roads as I drive at the speed limit, but on many county roads with speed limits of 55 or 60 mph, traffic usually moves at +5-8mph. Using autopilot is convenient because these tend to be many miles long, but it caused lots of unsafe overtakes by other drivers having to cross the dashed yellow line.

With the latest update as of August 1st, 2020, I was so pleased to see that speed limit for autopilot can be set to +-5mph. I usually have it set to +3mph relative speed...enough not to piss of drivers and also not too much to get pulled over.

Here are the update release notes. Small but useful features.

Autopilot speed +5mph on local roads


Saturday, July 18, 2020

DIY - Under Panel Drain (Speed) Holes

I read about Model 3s losing their bumpers due to filling up with water. When I look underneath at the rear diffuser and I see that there are some small holes where it meets the undertray for drainage, so I decided to make some enlarged holes along the slope. Drilling holes in cars always reminds me of this clip from the Simpsons.

"Speed holes"

I decided to perform this modification without having to remove the diffuser from the rear bumper as that was way too much work. This is where my "speed" holes are position and they do not interfere with the rear deep trunk section.

Friday, July 17, 2020

DIY - Eibach Lower Springs - Positive Wh/mi results

I specifically bought a P3D- because I wanted to make my own version P3D, by putting in better parts the Performance Upgrade Package aka PUP. Or even perhaps a P3D+ but with a twist such that I don't want a fully track dedicated car (as I have my GT-R) but I want it to be comfortable and efficient...in fact if possible more efficient than an LR AWD model. So the journey started by looking at brakes, aero parts, suspension components and eventually tires + wheels. I want it to come in under the cost of the Tesla PUP but with better parts.

Two piece rotors shave of approximately 14-16lb depending on front rotor size option. This is both sprung and unsprung weight. Sprung weight is not enough to make a considerable efficiency difference and the problem with the unsprung weight is that it is too close to the rotational axis i.e. lighter rotor hats not lighter rotors themselves. Therefore, maybe a last choice more for better braking and not efficiency, specially considering a $2,000-$2,200 cost, but I will first consider better brake fluids and lines.

One sure way to make a positive impact is aero. I first look at front splitters and rear spoiler. Anyone who watches any form of racing will know that the Model 3 "carbon" spoilers stuck on with 3M tape do absolutely nothing for considerable downforce. If my assumption is not correct, I should be able to put about 30-50lb of pressure on a spoiler stuck to a trunk with 3M tape and not have it snap off. 😅Therefore, it purely cosmetic unless bolted on and not worth the $1000 IMHO. A better rear under diffuser would take care of eddy currents behind the car. 

The front splitter is also a crock. Studying the front aero changes over 4 iterations of the current generation GT-R for the last 12 years has revealed what works and does not work in terms of aero. I don't care what a self funded CFD study states, the speeds at which you need to go to achieve ~5% efficiency simply by putting some additional plastic is not practical even for every day highway driving speeds. Visual inspection of the front of a Model 3 shows its pretty damn good aero design, if anything aftermarket products simply seem to cover the wheel opening slightly more, pushing the air out sideways. Perhaps sharing raw CFD data for a peer review would be one sure way for a vendor to stand behind product claims by manufacturers. Instead I believe that a more aero front under diffuser would help reduce the gap between the car and ground more cost effectively. This is what Nissan did to the GT-R after lap upon lap of Nürburgring testing.

So I next looked at lowering springs and for $324 the Eibach E10-87-001-02-22 PRO-KIT Performance Springs is one of the most cost effective ways to improve aero. Indeed my GT-R is lower and I can barely fit 2 fingers compared to my Model 3 in which I can fit 4 fingers between the tire and body. Lowering the car over an inch reduces drag, all around...period. Anyone an F1 tech fans? You know exactly what I am talking about. It also improves handling and could enhance ride quality. Bonus was that the springs are available on Amazon which means I can use gift cards to pay for it.

First off, I am extremely happy with the way the car looks with these springs on. This is how it should have been from the factory, IMHO.

Visual Comparison of before and after springs

Secondly, it is much more compliant on bumps due to the dual rate springs. The best way I can describe this improvement is that I can hear the tires hit road imperfections, but not feel them anymore. Before, I could immediately feel them as well as hear them. Handling is same to only slightly better, steering is very neutral as it was before. As you can see from my post about track mode, I do beat it up on back roads and these are not always the smoothest surfaces so compliance was important for me, I don't want it so stiff that it is unstable.

As for the Wh/mi, huge improvements here...

Wednesday, July 15, 2020

DIY - Changing Front Springs

Changing the front spring requires a little more precision and some special tools compared to the rear spring. In addition to the tools needed for the rear springs, this will require

  • A 13mm thin wall deep socket, and you may still need to grid the outer walls of the socket extra to have it fit through the mount to unbolt the struts. I used 1/4" drive socket which is the thinnest wall I can find and still had to grind the outside a few 10th of a mm using a Dremel.
  • TT50 and T40 Torx sockets
  • Long Hex Wrench (4.5 mm or 5 mm)
  • Strut socket
  • Straight edge & marker
  • Spring compressor (This can be rented from a parts store such as O'Reilly and is usually free after the deposit is refunded upon return
Changing front springs.

Start by removing the front trunk (frunk) as per these instructions.

Tuesday, July 14, 2020

DIY - Removal of Front Trunk

The Model 3 front trunk or (frunk, as its known on the streets) is fairly easy to remove.

Definitely needs to be removed to access things such as strut mounts for spring changes, front alignment and other service work.

To remove the frunk, first open the frunk lid. Remove the vent shield close to the wind shield. It is held by several plastic clips and simply pops up. The down arrows show the mounting points and the entire piece just pops up.

Cover removal.

Next remove the vent inlet. Again, it is held by the white plastic clips as illustrated and so it simply pops up. 

Monday, July 13, 2020

DIY - Eibach Lower Performance Springs - Rear Spring Install

Fair warning: If you are not mechanically inclined and have no experience working on cars, just don't do this. If the car is jacked unsafely or the torque is set wrong on suspension components and wheels, it can leave you dead. Just hire a shop to do it. This DIY is at your own risk.

Arguably doing the rear is easier because of the lack of need for specialized tools such as Torx bits and spring compressors. However, I did learn half way that removal of the rear diffuser is important to release the springs and to set the torque of bolts properly, so be prepared for that and see the approparite instruction here.
Eibach and Stock Springs side by side


Let's get started. The tools that will be needed are shown below.

Sunday, July 12, 2020

DIY - Removal of the Rear Diffuser for spring change or cleaning or extra drain holes

This is a lot easier to do with the car jacked up even on one side. Remove the 3 pop fasteners using a flat screw driver. Remove the small nut that hold the fabric in the wheel well behind the well, this will give easy access to other bolts. 

Note I have aftermarket splash guard so my setup looks different. Repeat this for the other rear wheel.  The wheel does not need to be removed, a short flat screwdriver will work just fine or come in from under the car.

Remove pop fasteners

Remove the two bolts from under the bumper behind each wheel. This needs to be repeated on each side. 

Saturday, June 27, 2020

Update June 2020 - Stop @ Traffic Control, Backup Camera and more...

The June 2020 Model 3 Update is upon us and full of many goodies. This one is loaded compared to last month's update.

- The Model 3 can now go through green traffic lights when it is certain you are in a straight only lane without requiring conformation using the stalk and also changes the color of the stop line to green or red depending on the traffic light. Hella cool.

Go at green light without confirmation
- The backup camera now has side repeaters added to the camera view. I suspect many are not using this you simply have to swipe the backup camera image up. Took me a little while to get this going, but the good thing is that it remembers the setting so next time you get to see the side view upon shifting to reverse. So useful in parking lot situations and tight spaces. Way to go, Tesla.
Other improvements include...

Saturday, June 13, 2020

Auto Pilot Stopping for Traffic Controls (+ Video)

On April 27th, I got the update that added Traffic Light and Stop Sign Stopping (beta). I am not sure if this feature has been rolled out of Beta, but I don't care because it is damn cool and extremely well built. I immediately went out and had to play with this new autopilot feature.

It recognizes that an upcoming stop sign or traffic light is being approached (even around corners) from what I imagine is a combination of navigation data and camera data and start slowing down the car to come to a stop.

.
Telsa Stopping for Traffic Control  automatically

This feature only works when full autopilot is engaged. With traffic lights, it starts to slow down even if the light is green or yellow and requires you to either tap the accelerator pedal or click on the drive stalk to continue and the car then resumes. If it is red and you tap the pedal or stalk, it checks the light again simply does the same. Pretty safe. The best part is stopping when there are no cars in front of you, right at the line.

When the light turns green or when you determine that it is safe to move from a complete stop at a stop sign it accelerates slowly first then resumes normal autopilot speed. Spo convient on stretches of highway that have traffic lights for cross roads.

To set it up...

Saturday, June 6, 2020

New DashCam Viewer (and other Updates)

Let's face it, almost no one ever took out the USB device that record Dashcam and Sentry Mode footage to see what has happened unless a specific event such as damage/ accident prompted one too. Long requested was the ability for Tesla to simply view the footage in the car. With the update on/around April 9th, 2020 that is exactly what Tesla did... finally... a Dashcam Viewer in the car! Awesome and extremely useful.

Tesla Dashcam Viewer

Now I almost always view Sentry footage before leaving a parking location and so far the results have been hilarious... from the unknowing person simply doing weird stuff while parked next to the Tesla or others impressed by the Tesla coming over to look at it. Piece of mind before leaving a spot against damage and vandalism.

Here is the update screen with the information about the Dashcam Viewer...

Wednesday, May 27, 2020

Update May 2020 - Supercharger filtering and Dashcam improvements

Tesla pushed out the May 2020 Update and some minor improvements as noted in the screenshots. Seems that the Tesla Toybox has been made easier. I like the new design. Also the charging sites map for superchargers and destination chargers indicate the speed and can be filtered upon by - Destination vs V2 vs V3.

Also the Dashcam can finally format the drive, I know there have been countless discussions on how to format the drives. See my post regarding my selection of USB drive, which after a year is still going strong. Really don't care about the backgammon improvements, though.

New Toybox and Charging Sites

Sunday, May 24, 2020

Setting Up and Using Track Mode V2 on Model 3

Track Mode on the Model 3 is pretty cool, especially because it keeps getting better as time goes on. It was very basic when I got my P3D- and has got better two times already. I have driven a number of times with track mode and it is simply a blast to drive, the beast wakes up in track mode especially when it puts down over 1000 Wh/mi of power and pulls 1 G of acceleration and 1 G of braking on non-sport brakes. Re-gen FTW!

Fun on some back roads with track mode.

Here is how to setup track mode and all the options that are available:

Thursday, May 14, 2020

New Sentry Mode Screen Animation

So apparently MGM did not like Tesla using Hall 9000 from the movie '2001: A Space Odyssey' for Sentry Mode. So it switched to something else with an update that resembles a turret from the game Portal. Those jerks at MGM!

Sentry mode is pretty cool to keep the vehicle safe when left alone, though it does use some additional power but not much to affect range unless you leave it on for many days. This is what the new icon looks like:

New Sentry Mode screen graphic when activated

One thing I have found is that Sentry mode gets a lot of false alarms at night. See the video.

Sunday, May 10, 2020

Tesla Summon with integrated HomeLink opens & closes garage door to pull itself out

The Model 3 does not come with HomeLink built-in anymore. It can be purchased as an accessory after the fact for $300. 

My suspicion is that this was done to keep licensing costs to HomeLink by Tesla low, so that instead of it being licensed on every car, it is just on the ones that need it. Annoying for those that need it, but good business strategy. On the flip side I like that the Model 3 doesn't come with XM radio, which is a waste on most cars.

A service center receives the accessory when ordered and then a mobile tech can come and install it if you do not want to go to a service center.

My local mobile tech came over with the part and installed in my garage. The install requires, both hardware and software to be installed. The hardware gets installed behind the front bumper, which must be removed by the tech and then the software loaded remotely and finally the user configuration.

The configuration is simple. Just click on the HomeLink icon and configure attach to the existing garage door as per the instruction here: https://www.tesla.com/support/homelink-faq
Configuring HomeLink on the Model 3
The optimal configuration for the garage door I found is configuring it with the car in the garage.
Awesome video at the end of this blog.

Saturday, April 25, 2020

How to install Hero Me hot end cooling to and Ender 5. Stock fans. No soldering.

After much research, reading and watching reviews, I decided that a good choice to improve stock hot-end cooling would be to install the Hero Me Gen3 - CR-10/S Ender 3/Pro/5 OEM Hot-end by mediaman. This is very well thought out design with lots of attention to details. I have seen many versions of the HeroMe for the Ender 5 with aftermarket bigger fans, multiple fans, etc. but all those required soldering, which I did not want to tackle initially. So as a first stage,  I just used stock fans. I will upgrade later if for example PTEG printing requires more cooling.

Hero Me Gen 3 on Ender 5
The overall installation did require some minor modification after printing and some attention to detail during installation to get it perfect. Here are the simple DIY instruction for this awesome mod for the Ender 5:

Wednesday, April 8, 2020

FINALLY FIXED: Failed to turn on climate, Climate keeper unavailable due to system fault

Ever got this message when trying to pre-warm your car from the app:
Failed to turn on climate

Or this message when you car is parked:

Monday, March 16, 2020

Using Summon at Night in a Busy Parking Lot

My car was about 10 days old and I had just paid for FSD about 24 hrs prior via the mobile app.

The vehicle was parked at the end of the parking lot in a strip mall. I had taken my in-laws for dinner and they had no idea what a Tesla was.

To come get me, the had back out, not hit the curb behind, make a 90 degree turn, then make another 90 degree turn to come get me.

Additionally a car pulled into the parking lot going to a space that was in the path, so it had to negotiate that. The ladies in the car thought that the Tesla was vying for the same spot. A lot could have gone wrong. All I did was held then button down on the Smart Summon and hoped nothing bad would happen, at this point I was committed.


The outcome had a a little laughable moment. The poor girls assumed the Tesla was stalking them. I had to apologize to them.

Gotta love Smart Summon!

Thursday, March 12, 2020

Update March 2020 - Track Mode V2

I got a notification on my phone that the there was a new software update. I was so excited to get 2020.8.1 update. I went to the car to make sure it was plugged in, because I needed it charged for the next morning. I clicked the Update button on the Tesla mobile app.

The screen in the car immediately changed to this 2 minute warning. and displayed a yellow timer logo on the top status bar.
2 minute warning that the car is about to do a software update
While the update was going on, the mobile app displayed the the updated percentages and showed when the car was rebooting (Lol!)

Sunday, February 16, 2020

DIY - Stopping window squeaks and noises with Gummi Pflege Stift

Since day 1, the drivers side window has squeaked. It is most pronounced when the vehicle moves up and down, i.e. going over a bump or when stopping and starting. Opening the window slightly, makes it go away and also gently pressing against the top part of the glass with the window closed while driving makes it go away too.

I was especially able to determine root cause when driving on a long trip as it became irritating whenever the road surface was not perfectly smooth. So either the seal there was too stiff or metal behind the seal that is causing the squeak of the window on the seal.

I tried removing and re-seating the top part of the driver's door seal and also talked to support. The consensus was that rimless windows are subject to this. Well, I have 2 other cars with rimless windows, my GT-R that is 11+ years old, and therefore has gone through 11 winters and summers, does not exhibit any of these problems. The seals on the Model 3 seem rather stiffer, compared to other cars.

So the solution ended up applying a liberal amount of  Gummi Pflege Stift at $12 from amazon to the door seals in multiple locations.
The key to stopping window squeaks in Model 3
I first tried first applying it to the outside surface, but the issue only went away for a few days. Then I applied it to the inner part of the seals for a complete fix:

Friday, February 14, 2020

DIY - Tesla Logo Visor Ticket Holder

For 10+ years you use a feature in cars and simply assume that every car has it. Then one day, you get a new Model 3 and realize when upon entering a parking ramp that the usual spot for putting the parking ticket in the visor simply doesn't exist. So now the ticket ends up behind the visor sometimes, or in the console in so many different places, or in the wallet. Repeat procedure in reverse when leaving the ramp trying to look for the ticket. Frustrating first world problem.

Anyways, I was on two very long flights recently and decided to put some rusty college skills to use and design my very own ticket holder. I wanted to to be a simple thin minimalist clip that follows the contours of the Model 3 visor and can hold one tiny piece of paper for me. Function before form!
Then the idea of extending the shape into a Tesla logo dawned upon me - because that is what a design engineer at Tesla would most likely do. The result:
DIY Visor Ticket holder for Model 3 in the shape of a Tesla logo 
And here it is in white, which was my first prototype in white:

Wednesday, February 5, 2020

DIY Second Layer Door Seals and Gaskets

One of the items that was recommended by Amazon's "others who bought this, also bought" feature was Basenor door seals kit for the Model 3 to reduce wind noise, etc. So I ordered one, and after a quick assessment, I promptly returned them. I don't like writing negative reviews, but these were badly designed and would have been a waste of time and money. I made a quick video about the problem to warn others:


Since the bug to improve the door seals had bit me, I started to do some research and started looking for other seals. Nothing decent existed on the market. I ended up using my GT-R as a model for where additional door seals ought to be placed.

Monday, February 3, 2020

DIY - Install Wireless Charging Pad my New Pixel 4

So I got a Pixel 4 as an upgrade to my Pixel 1 and one of the features it has is wireless charging. I had it on an old Samsung phone ages ago, but was not a fan because of the blue lights emitted from  the charging puck.They were super annoying at night time in the bedroom rendering the wireless charging useless for me.

Wireless charging makes sense does make sense in the car for sure, specially when there is a specific location to place the phone as in the Model 3. However, I do still carry a 12 V USB fast charger. There have been times I am going to the airport for a trip at 5 am (which I tend to do a lot) and realized my phone wasn't plugged in overnight or the charger cable got kicked out by the kids or the vacuum cleaner. Fast charging has saved my butt, so that is my backup now in the Model 3, since wireless charging is not fast enough.  I keep the 12V USB charger unplugged to minimize any phantom Model 3 battery drain.

To install this simple mod to support wireless charging for the Model 3, I order this TapTes Wireless Charging Pad from amazon with ran about $35 with a coupon. It was a good deal.
TesTap Wireless Charging Pad installed with Pixel 4 charging,

The installation was super simple....

Sunday, January 19, 2020

DIY FAIL - Aftermarket Tesla Logo Door Puddle Light Projectors

I installed these on my Infiniti and it added a little class, they were nice and bright, so I figured why not do the same for the Model 3.
Oh boy was I wrong! Not only were these units super cheaply made (no doubt to get to market quickly), but disconnecting the stock puddle light from the Model 3 gives an error message and invoked manual door release. This caused the glass to come down and not go up until a light was replaced.
Great idea, bad implementation
This indeed had further important quality implications ...

Saturday, January 18, 2020

Gen 2 Key Fob and DIY Key Holder

I find the lack of a key fob rather disturbing! Okay, simply more annoying than anything. I have 3 issues with the card key - 1. I don't want to fatten my wallet any more, it is already literally a pain in my rear when I sit on it, and 2. while I use the phone extensively as the key and like it, I don't have a place to carry my house key and gym card and I fear breaking or losing my phone on a trip and then being stranded at the airport.

Luckily, the second generation Tesla car-shaped key fob had just come back into stock when I bought my Model 3, so I immediately ordered one and got it in just 3 days.

Passive entry automatically locks and unlocks the Tesla when the paired key fob is within 3 feet. Same with the trunk. Additionally, pressing the top once to lock your Model 3 and twice to unlock; press twice on the front or rear trunk to open them.

This item is simply a thing of beauty compared to regular key fobs. Way-to-go Tesla, making something humdrum rather interesting again. I think the last key fob advancement was perhaps the flip out key.

Coupled it with an after-market silicone sleeve and a quick release aluminum clip gives me an instant key fob with key chain holder. I can easily swap out keys and take it with me as a backup in my laptop bag.
Tesla gen 2 key fob with silicone sleeve and aluminium quick-release clip
First lets look at the key fob box, this is a thing of beauty:


Wednesday, January 15, 2020

DIY - Selectng a USB Drive for Sentry Mode & Dashcam

I have been testing a few different combinations of recording device options and I can share some results.

I started with a Transcend 256GB JetDrive that I used to use on my Mac with a Trancend USB 3.0 Card reader. I had read on forums that GPT was better than MBR in terms of partition choice. (Note that most SSD cards/ USB drives come formatted as MBR with FAT32 or exFAT if  greater than 32GB).
Trying to reuse some hardware laying around. GPT was too slow. Adapter ran too hot

Unfortunately, this combo above only worked for a few minutes before I got the dreaded too slow error. GPT I suspected was the culprit.

There are a number of tools that I use verify this are a combination off dd command on a linux box or Crystal DiskMark for Windows. For formatting, I use Gparted on a Linux box to format large devices with FAT32.  I used diskpart (via command line not powershell) to convert between MBR and GPT. Unfortunately, nothing on windows compares. If you want to use a hypervisor, I recommend VMware Workstation (trial) as that is the only one I have found (compared with VirtualBox and HyperV) which allows direct USB access and therefor proper formatting.

So I check this combo with a simple dd test using sequential large blocks and it ran 1.3MB/s. I converted it to MBR and reformatted FAT32. DD ran about 11MB/s writes and 78 MB/s read. It gave no errors for TeslaCam with 1 day of driving around, but ran too hot. Too hot for my liking and I did't like how it stuck out of the USB port, could be prone to accidental breakage when using the storage space. So it was time to investigate some options and run some test and found that I am not a fan of USB to SD card adapters.

Tuesday, January 14, 2020

DIY - USB-C Charging Cable

I was a little bummed when I took delivery of my Model 3 that it did not come with a charging cable for my phone.Seems that some prior deliveries had the option of either a USB-C or whatever Apple devices use-these-days cable. However, they had run out of stock, so a Model 3 license plate frame was my free give accessory. Little things like that annoy me, just have these accessories in stock at delivery centers and I bet most people would plop down a few hundred bucks easily for the convenience of  mats, cables, key fobs, etc. being immediately available.

I did, however, have a 12V USB-C fast charger, but I found the location of the 12V outlet inconvenient and wanted a cable free look. Unfortunately, because the cable was out of stock and I needed to charge my phone - a Google Pixel 1 with a slim case on it - I scoured amazon for a suitable cable, but none were listed as being compatible with the Model 3 as part of the description. So a little trial and error lead me to finally settle on this cable.
DIY Cable installed since Tesla cable was out of stock.
I was looking for some simple traits:

Wednesday, January 8, 2020

Nitrogen Fill of Tesla Tires (and Spare)

My Nissan GT-R is the first car I ever owned that came with Nitrogen filled tires from the factory and required N2 fill for tracking the car. There are a lot of myths and urban legend about benefits of nitrogen filled tires, especially at a cost. This is also a very confusing and controversial topic in the automotive community.

So what is the main reason for my N2 setup - consistency. The second benefit I have found over the years is simply convenience. Lastly, I have concluded after 12 years of using N2, on my motorcycle and winter tires that degradation is reduced considerably specially when tires life outlast thread life.
This tiny little Nitrogen tank lasts over 1 year, with 4 cars and 1 motorbike.
The Wh/mi of the Model 3 seems to be rather sensitive to tire pressures, so having a quick and convenient way to ensure consistency is helpful. The typical advertised benefits of Nitrogen or N2 are often stated,

DIY Body Colored Splash Guards Mud Flaps

For wet weather and snow driving, I think it is an absolute must to have some decent mud guards on the car. Just on the drive from the Tesla delivery center to back home, it was apparent that the lower part of the front doors and the rear quarter panel took a beating from road dirt, grime, road construction and other road gunk. I could only imagine at that time, what impending rain, snow and slush would do and not to mention chips occurring over time.

Luckily, I found these body color matched mudflaps listed on amazon for $35:
Body color matched low-profile mus flaps with har
Not sure why this is not a factory option offered by Tesla, but then I guess most people in warmer states like CA would never need these. I have always but OEM ones on all cars. Installation was a breeze. Overall the color is almost the same, but hard to tell the difference, at least on blue, and it does require 1 hole to be made in the plastic under-body which was not a big deal. The profile was low enough to not increase drag. The instillation was done as follows:

Tuesday, January 7, 2020

DIY - Spare Tire Kit for a Little Peace of Mind

The spare tire is a controversial topic these days. Obviously, the accountants for major auto manufacturers have made this decision for us. Most new sedans don't come equipped with one - even with a temporary compact spare. I'm sure cost, weight, probability of flats, lack of knowledge by owners to change, safety, liability, road-side assistance access, blah, blah, blah, excuses can be given. Ever since I was about 13, my dad taught us to change a flat, because well... $hit happens and it has happened over the years.

Thinking back to the numerous times that I have pulled over (even while on my bicycle) to help clueless drivers change their flat tire makes me sure that I always want one handy for myself.  Personally, I don't want to be stuck on the side of a road in a remote location over a holiday weekend with the family in the car and be completely powerless to do anything, but wait for someone to show up and tow me. So I have always built a spare kit for every vehicle that I have owned, and my Model 3 is no exception.

Luckily with some DIY ingenuity, I was able to re-purpose a kit for my Model 3 using the kit from my previous Infiniti. Having a spare is only the the half of it, knowing how to change it safely is the other half.

Net result, an 18" tire/wheel that matches very closely with my Tesla 19" sized tires, has the adequate weight capacity rating and is an exact fit around the hub and studs. Coupled with that a scissors-jack, lug wrench, jack adapter, lugs and spacer kit.

The keen eyed will noticed that it is balanced and filled with Nitrogen.
DIY 18" Alloy Spare Tire Kit for Model 3- Success!
Of course this kit is not complete without a set of proper spare tire tools to actually be able to change a tire: